Licensees are required to report any changes to their client trust account (CTA) information within 30 days of the change. Firms or organizations that maintain client trust accounts on behalf of their licensees can use Agency Billing to report the required updates.
To report changes to client trust accounts on behalf of the licensees in your firm, on the "Client Trust Account Reporting" tile on your account dashboard, click "Go to CTA Reporting."

Next, a pop-up with your client trust account reporting options will appear, select "Report changes to trust account information within 30 days pursuant to rule 2.2(c)" to report client trust account updates.

On the CTA 30-Day Reporting dashboard, you have the following options:
- Update accounts reported in prior reporting periods
- Report new accounts or update accounts reported since the annual reporting period
- Associate or disassociate attorneys in your firm to accounts
Update accounts reported in prior reporting periods
To report changes to accounts from previous reporting periods, click on the "Accounts Reported in Prior Periods" tab.

In the "Accounts Reported in Prior Periods" tab, you can:
- Notify that a previously reported client trust account has been closed
- Notify that a previously reported client trust account is now no longer active
- Upload client trust account changes
Notify that a previously reported client trust account has been closed
To notify that a previously reported client trust account has been closed, click the "Manage Accounts" button.

Once you click the "Manage Accounts" button, a pop-up will appear with a list of all previously reported accounts. Locate the required account and click the pen icon in the Options column to indicate that the account has been closed.

Enter the date the account closed in the "Date Account Closed" field.

Note: If you report a close date beyond the 30-day requirement, you will need to provide an explanation for the late reporting.
Once you have provided the closing date of the account, enter the account balance on date account was closed. Then, choose one of the following reasons for closing the account:
- All funds distributed to clients
- Fraud
- Other (if selected please provide additional details for the reason for closure)

After making any changes, click the "Update" button to submit your updates. The account you have updated will then display the reported close date and the reason for closure.

Note: Once an account is closed, you cannot update or edit it. If an account is mistakenly closed, you can add it as new by using the "Current Period Reporting" tab.
Notify that a previously reported client trust account is now no longer active
To notify that a previously reported client trust account is no longer active, click the "Manage Accounts" button.

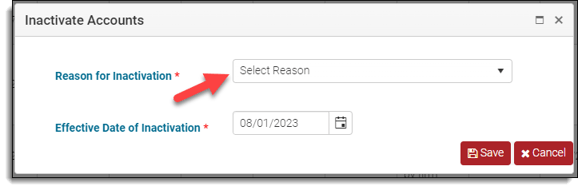
Once you click the "Manage Accounts" button, a pop-up will appear with a list of all previously reported accounts. Locate the required account and click the notice sign icon in the Options column to indicate that the account is now inactive.

- Account transferred to another attorney or firm
- Bank Merger - close/re-open
- Added by error
- Other (if selected please provide additional details for the reason for inactivation)
Note: If an account is made inactive, any attorneys previously associated with it will be automatically disassociated.
After entering your changes, click the "Save" button to submit. The account you updated will then display the reported reason for inactivation along with the effective date.

Note: Once an account has been made inactive, you cannot update or edit it. If an account is mistakenly made inactive, you can add it as new by using the "Current Period Reporting" tab.
Upload client trust account changes
You also have the option to report multiple changes simultaneously by using the upload process.
To upload changes to your accounts, download the Excel Bank Details spreadsheet template. This template allows you to close or make previously reported accounts inactive.
Note: To upload new accounts, use the Bank Details upload process located in the "Current Period Reporting" tab.
To obtain the Excel spreadsheet template for the Bank Details upload process, click on the "Download Bank Details" button. This will download the Excel template, which you can then fill out with the necessary information.
Note: The download may appear differently depending on your browser. It could display on your screen, in a pop-up box, in your downloads folder, or it might automatically open when you click the button.

In the Excel template, go to the 'Instructions' tab. There you will will find detailed guidelines on how to enter or modify your agency's account information. Take the time to read and follow these instructions carefully to ensure accurate and up-to-date data entry.

After you have familiarized yourself with the instructions, go to the 'BankDetails' tab to make any necessary edits to the account information.

After making all the necessary changes in the template, save it to a location of your choice on your computer. Then, return to your Dashboard and click on the 'Upload Bank Details' option.

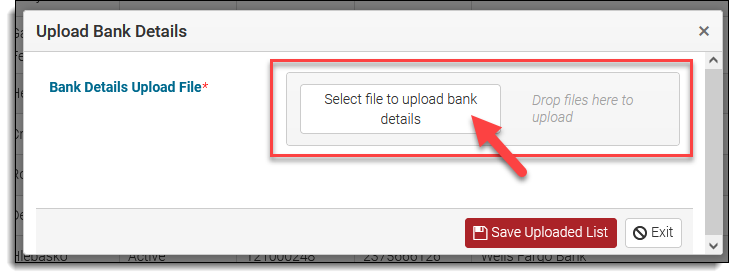
Next, the Upload Bank Details pop-up will appear. Use the pop-up to upload the Excel spreadsheet you saved. Click on ‘Select file to upload bank details’ or drag and drop your saved Excel spreadsheet into the area labeled "Drop files here to Upload."
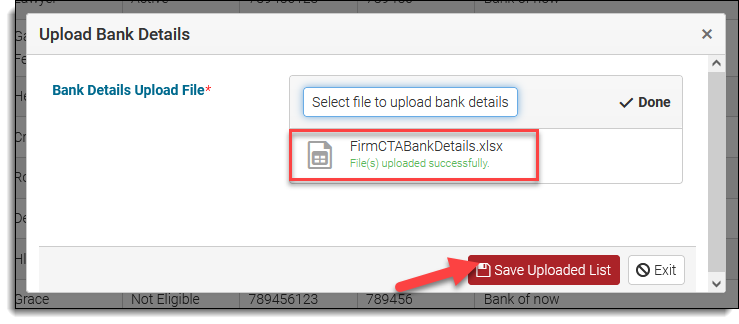
A message will appear indicating if your file was successfully loaded. If your file was successfully loaded, click "Save Uploaded List" to proceed.
Note: If there are any issues with the Excel spreadsheet you upload, use the "Upload Errors" feature to identify and view any issues that require resolution.
Report new accounts or update accounts reported since annual reporting period
To report new accounts or update accounts reported since the annual reporting period, click the "Current Period Reporting" tab.

In the "Current Period Reporting" tab, you have the option of:
- Report new client trust accounts
- Notify that an account reported in current reporting period is now closed
- Notify that an account reported in current reporting period is now inactive
Report client trust accounts
To add a new client trust account, click the "Manage Accounts" button.

Next, the click the "Add Account" button.

Then, the Bank Information pop-up will appear. Complete the required fields and click "Update" to add the account.

Note: If you report an account with an open date beyond the 30-day requirement, you will need to provide an explanation for the late reporting.
Your new account will not be present on your client trust account details list. Click "x" to close the pop-up.

Notify that an account reported in current reporting period is now closed
To notify that an account reported in the current period has been closed, click the "Manage Accounts" button.

Once you click the "Manage Accounts" button, a pop-up will appear with a list of all reported accounts. Locate the required account and click the pen icon in the Options column to indicate that the account has been closed.

Enter the date the account closed in the "Date Account Closed" field.
Note: If you report a close date beyond the 30-day requirement, you will need to provide an explanation for the late reporting.
Once you have provided the closing date of the account, enter the account balance on date account was closed. Then, choose one of the following reasons for closing the account:
- All funds distributed to clients
- Fraud
- Other (if selected please provide additional details for the reason for closure)
After making any changes, click the "Update" button to submit your updates. The account you have updated will then display the reported close date and the reason for closure.
Note: Once an account is closed, you cannot update or edit it. If an account is mistakenly closed, you can add it as new by using the "Current Period Reporting" tab.
Notify that an account reported in current reporting period is now inactive
To notify that a reported client trust account is no longer active, click the "Manage Accounts" button.

Once you click the "Manage Accounts" button, a pop-up will appear with a list of all previously reported accounts. Locate the required account and click the notice sign icon in the Options column to indicate that the account is now inactive.
- Account transferred to another attorney or firm
- Bank Merger - close/re-open
- Added by error
- Other (if selected please provide additional details for the reason for inactivation)
Note: If an account is made inactive, any attorneys previously associated with it will be automatically disassociated.
After entering your changes, click the "Save" button to submit. The account you updated will then display the reported reason for inactivation along with the effective date.

Note: Once an account has been made inactive, you cannot update or edit it. If an account is mistakenly made inactive, you can add it as new by using the "Current Period Reporting" tab.
Upload client trust account information
You also have the option to report multiple changes simultaneously by using the upload process.
To upload changes to your accounts, download the Excel Bank Details spreadsheet template. This template allows you to close or make previously reported accounts inactive.
Note: To upload new accounts, use the Bank Details upload process located in the "Current Period Reporting" tab.
To obtain the Excel spreadsheet template for the Bank Details upload process, click on the "Download Bank Details" button. This will download the Excel template, which you can then fill out with the necessary information.
Note: The download may appear differently depending on your browser. It could display on your screen, in a pop-up box, in your downloads folder, or it might automatically open when you click the button.

In the Excel template, go to the 'Instructions' tab. There you will will find detailed guidelines on how to enter or modify your agency's account information. Take the time to read and follow these instructions carefully to ensure accurate and up-to-date data entry.
After you have familiarized yourself with the instructions, go to the 'BankDetails' tab to make any necessary edits to the account information.
After making all the necessary changes in the template, save it to a location of your choice on your computer. Then, return to your Dashboard and click on the 'Upload Bank Details' option.

Next, the Upload Bank Details pop-up will appear. Use the pop-up to upload the Excel spreadsheet you saved. Click on ‘Select file to upload bank details’ or drag and drop your saved Excel spreadsheet into the area labeled "Drop files here to Upload."

A message will appear indicating if your file was successfully loaded. If your file was successfully loaded, click "Save Uploaded List" to proceed.

Note: If there are any issues with the Excel spreadsheet you upload, use the "Upload Errors" feature to identify and view any issues that require resolution.
Associate or disassociate attorneys in your firm to accounts
Once you have made changes in either the "Accounts Reported in Prior Periods" or "Current Period Reporting" tabs, you can choose to associate or disassociate attorneys in your firm to the accounts.
- Associate or disassociate licensees from accounts
- Upload associate or disassociate from account changes for multiple licensees
- Associate or disassociate all licensees from accounts
Associate or disassociate licensees from accounts
You can verify if an attorney is associated or disassociated from a registered account by using the either the Current Association or Assoc./Disassoc. columns.
The Current Association will display:
- Yes for associated to the account.
- No for disassociated from the account.
- Blank for disassociated from the account.
In the Assoc./Dissaoc. column, you will notice the (+) and (-) signs. If the (-) sign is red, it means that the licensee is currently associated with that account and can be disassociated if necessary. On the other hand, if the (+) sign is green, it indicates that the licensee is not associated with the account and can be associated if needed.
Select the action you with to take, either (-) to disassociate the licensee from an account or (+) to associate a licensee to an account.
Note: If you add new accounts, all licensees will be automatically disassociated from them. To ensure that the association appears in the individual attorney's My State Bar Profile, you will need to associate any required attorneys with the newly added account.

Next, select the appropriate response from the pop-up confirmation window.
If disassociating a licensee:
If associating a licensee:
Once your change has been submitted, the Current Association column will update and you will see that the (–) sign is no longer in red for the attorney you removed and that the (–) sign is red for the attorney you added.
Upload associate or disassociate from account changes for multiple licensees
If you wish to associate or disassociate licensees to accounts as a group, click the "Download CTA Connection to Licensees" in either the "Accounts Reported in Prior Periods" or "Current Period Reporting."

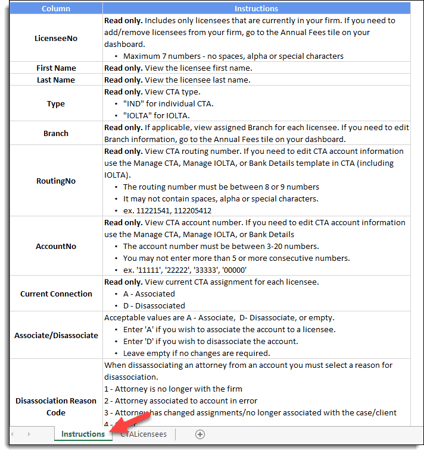
In the Excel spreadsheet, navigate to the "Instructions" tab where you will find detailed guidelines on how to associate or disassociate a licensee from a specific account.
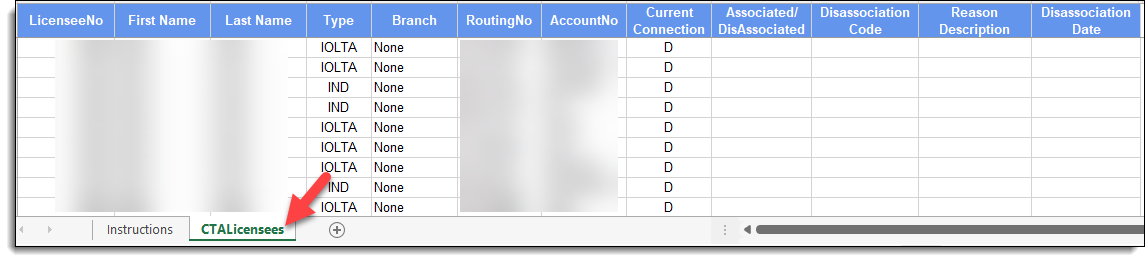
After familiarizing yourself with the instructions, simply click on the 'CTALicensees' tab to associate or disassociate licensees from specific accounts.
After you have finished entering your information, save the spreadsheet to a location on your computer that you prefer. Return to your dashboard and select the "Upload CTA Connection to Licensees" option to upload your spreadsheet with the changes.

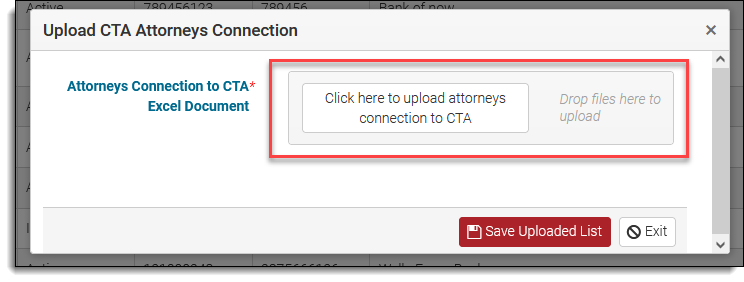
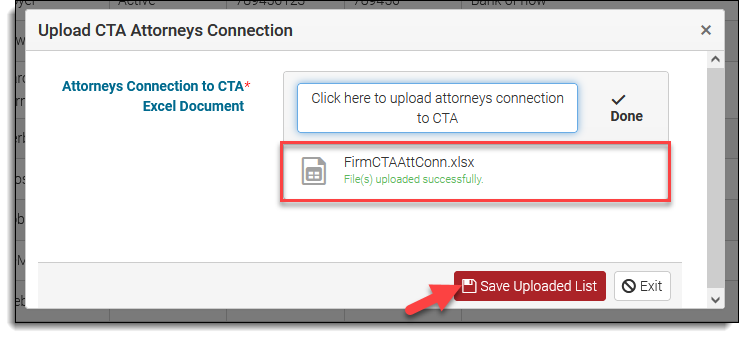
The Upload CTA Attorneys Connection pop-up will appear. Use the pop-up to upload the Excel spreadsheet you saved. Click on ‘Select file to upload bank details’ or drag and drop your saved excel spreadsheet into the area labeled "Drop files here to Upload."
A message will appear indicating if your file was successfully loaded. If your file was successfully loaded, click "Save Uploaded List" to proceed.
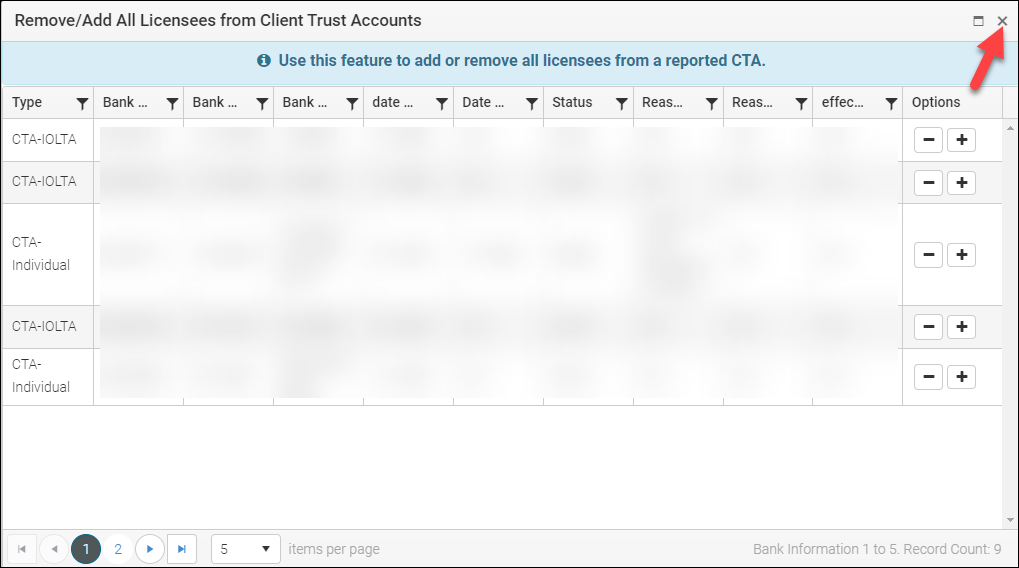
Add or remove all licensees from accounts
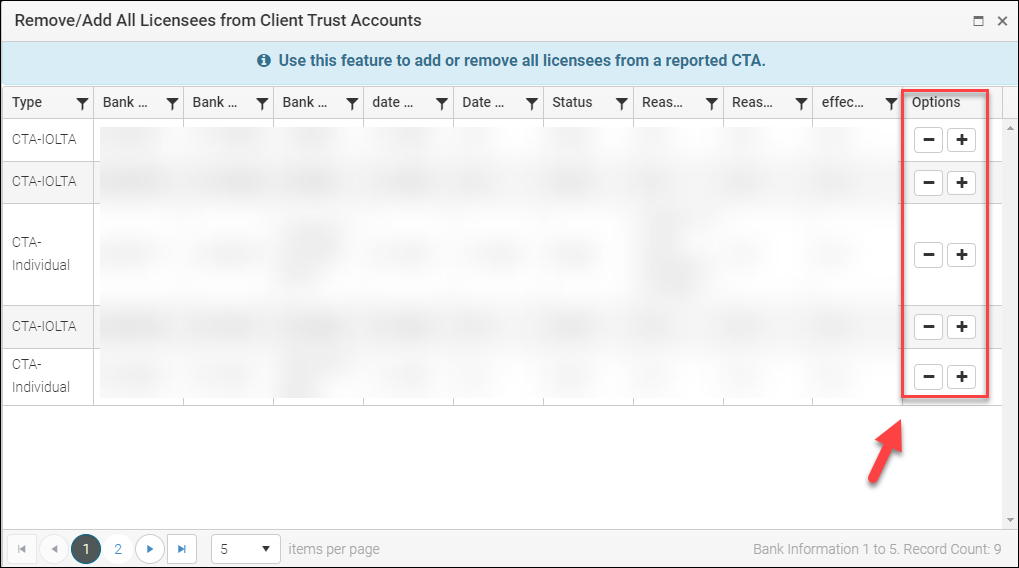
To add or remove all licensees from an account, click the "Remove/Add All Licensees" button.

The pop-up window for removing or adding all licensees from client trust accounts will appear. From there, you can select the specific account you want to remove (-) or add (+) licensees to.
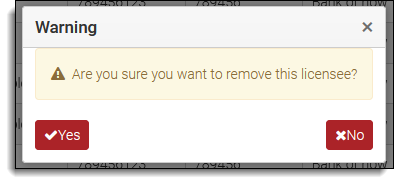
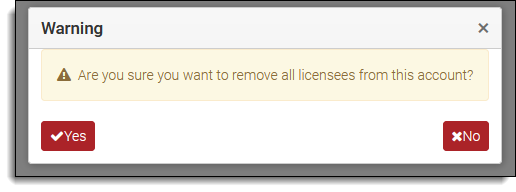
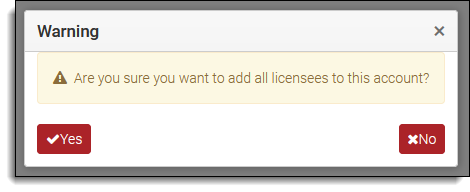
Next, select the appropriate response from the pop-up confirmation window.
If removing all licensees:
If adding all licensees:
Click the "x" to close the Remove/Add Client Trust Accounts pop-up.
Questions? Contact us.